Attic insulation plays an important role in maintaining indoor comfort, managing energy use, and protecting your home from unwanted outdoor conditions. However, when insulation becomes wet, damaged, moldy, or contaminated by rodents, simply adding another layer may not solve the problem.
Attic insulation removal and replacement involves removing damaged or contaminated material, cleaning the attic, addressing underlying problems, sealing air leaks, and installing new insulation suited to the home’s needs. For homeowners in Dallas–Fort Worth, checking attic insulation is particularly important because rodent activity, roof leaks, and poor attic ventilation can affect insulation performance.
This guide explains when attic insulation needs to be replaced, which warning signs to look out for, the estimated costs based on the size of the attic, the removal process, and when it is best to seek professional help.
Should You Remove Old Attic Insulation or Add More?
You do not always need to remove existing attic insulation before installing a new layer. If the material is dry, clean, evenly distributed, and free from mold or animal waste, adding more insulation may be enough.
However, complete attic insulation removal and replacement is recommended when existing material is:

- Wet or damaged by roof leaks.
- Contaminated with rodent droppings, urine, or nesting materials.
- Affected by mold or persistent musty odors.
- Heavily compressed or unevenly distributed.
- Mixed with debris, dust, or other contaminants.
- Suspected to contain asbestos, such as certain older vermiculite insulation.
According to ENERGY STAR, existing insulation can generally remain in place when it is in good condition. However, wet, moldy, smelly, or animal-waste-contaminated insulation should be addressed before adding new material.
The right decision depends on the insulation’s condition, not just its age.
7 Signs Your Attic Insulation Needs Removal and Replacement
Attic insulation problems are not always easy to identify from inside your home. Changes in indoor temperatures, unusual odors, and increasing energy bills can indicate that something is wrong above your ceiling.
Here are seven warning signs homeowners should watch for.
1. Rodent Droppings and Nesting Materials
Rodents can enter attics through small openings around rooflines, vents, and other structural gaps. Once inside, they may chew insulation, create nests, and leave droppings and urine behind.
Contaminated insulation can create unpleasant odors and sanitation concerns. Simply covering it with new insulation will not address the underlying problem.
If you notice rodent activity, address the pest problem and entry points before installing replacement insulation.
2. Mold and Musty Odors
Moisture from roof leaks, condensation, or ventilation problems can contribute to mold growth in attic spaces.
Signs include visible mold, dark spots, damp insulation, and persistent musty smells. Damaged material should be evaluated and addressed before new insulation is installed.
3. Wet or Water-Damaged Insulation
Roof leaks and plumbing problems can expose insulation to moisture. Wet fiberglass can lose its shape and insulating performance, while other materials may retain moisture or become contaminated.
Repair the source of the water before replacing the insulation.
4. Compressed or Uneven Insulation
Insulation works by trapping air within its structure. When it becomes compressed, settles, or develops gaps, its ability to resist heat transfer can decrease.
Check for areas where the insulation is unusually thin, flattened, or missing.
5. Higher Energy Bills
If heating and cooling costs increase without an obvious explanation, inadequate attic insulation or air leakage may be contributing factors.
Insufficient insulation can make your HVAC system work harder to maintain comfortable indoor temperatures.
6. Uneven Indoor Temperatures
Rooms that feel hotter during summer or colder during winter may indicate insulation gaps or air leakage.
Attic insulation helps reduce heat transfer between the attic and living spaces, supporting more consistent indoor comfort.
7. Excessive Dust and Unusual Attic Odors
Old insulation can collect dust, debris, and particles over time. Rodent activity, moisture, and deteriorating materials can also contribute to unpleasant odors.
If these conditions are present, an attic inspection can help determine whether cleaning, pest treatment, insulation removal, or replacement is necessary.
How Much Does Attic Insulation Removal and Replacement Cost?
The cost of attic insulation removal and replacement depends on several factors, including attic size, existing insulation type, accessibility, contamination, disposal requirements, and the type of new insulation being installed.
Every attic is different, so the overall project cost depends on the condition of the existing insulation and the amount of work required. Attics with rodent contamination, moisture damage, mold, or accumulated debris may require additional cleaning, sanitation, and repairs before new insulation can be installed.
What Factors Affect the Final Cost?
Several factors can change the total project price:
- Attic size: Larger spaces generally require more labor and replacement material.
- Insulation type: Blown-in insulation, fiberglass batts, and spray foam involve different removal and installation methods.
- Pest contamination: Rodent waste, nesting materials, and damaged insulation may require additional cleaning and pest control.
- Moisture and mold: Water damage may require repairs and specialized remediation.
- Accessibility: Low clearance, difficult entry points, and limited working space can increase labor costs.
- Air sealing: Gaps around pipes, wiring, vents, and attic openings may need sealing before installation.
- Disposal: Removing and transporting old insulation can add to project expenses.
Before approving a project, ask for an itemized estimate that separates removal, cleaning, pest-related work, disposal, air sealing, and new insulation installation.
The Attic Insulation Removal and Replacement Process
A proper replacement project involves more than removing old material and putting new insulation in its place. The attic should be inspected, cleaned, and prepared so the replacement material can perform effectively.
Here is how the process generally works.
Step 1: Inspect the Existing Attic Insulation
Start with an inspection of the attic to identify moisture, mold, rodent activity, damaged insulation, blocked ventilation, and other potential problems.
The inspection should also identify the existing insulation material and determine whether removal is necessary.
If older vermiculite insulation is present, do not disturb it. The EPA recommends assuming vermiculite insulation may contain asbestos and leaving it undisturbed unless handled by a qualified asbestos professional.
Step 2: Prepare the Attic for Removal
Before removal begins, the work area should be prepared to control dust and prevent debris from spreading into living spaces.
Appropriate protective equipment may include respirators, gloves, goggles, and protective clothing.
Proper lighting and safe access are also important, especially in attics with limited clearance.
Step 3: Remove the Old Insulation
The removal method depends on the material.
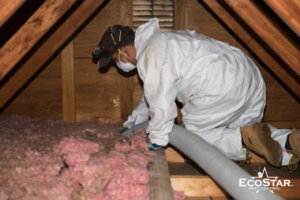
Fiberglass batts and rolls are generally removed by hand and placed into suitable disposal bags. Blown-in insulation is typically removed using specialized insulation vacuum equipment.
Contaminated or hazardous materials require additional precautions and may need qualified professionals.
Step 4: Clean the Attic and Address Pest Problems
Once the old insulation is removed, the attic can be checked for accumulated debris, rodent nesting materials, droppings, damaged areas, and other hidden problems.
If rodents have entered the attic, pest control and exclusion measures should be addressed before installing new insulation.
Cleaning and sanitation requirements depend on the type and extent of contamination.
Step 5: Seal Air Leaks and Repair Damage
Before installing replacement insulation, inspect gaps around plumbing pipes, electrical penetrations, attic hatches, and other openings.
Air sealing helps reduce unwanted air movement between the attic and living spaces.
Any roof leaks, damaged ductwork, or ventilation issues should also be addressed before the new insulation is installed.
Step 6: Install New Attic Insulation
The replacement material should match the home’s insulation requirements, existing attic structure, and ventilation arrangement.
Common options include:
- Fiberglass batts: Pre-cut insulation suitable for accessible spaces with standard framing.
- Blown-in fiberglass: Loose-fill material that can cover irregular areas and attic floors.
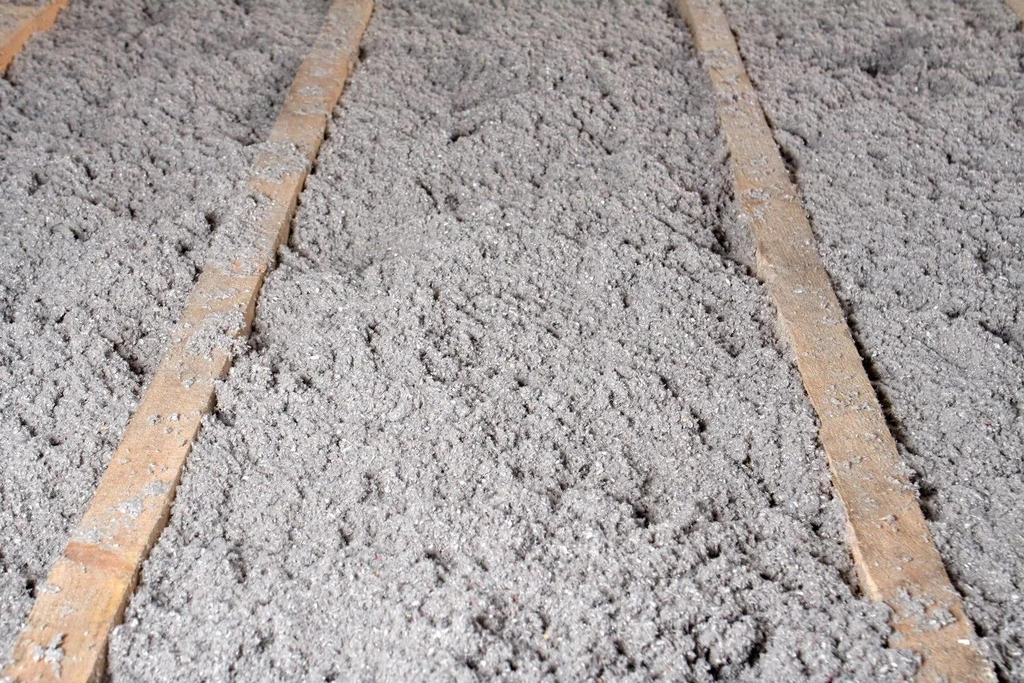
- Cellulose insulation: A loose-fill option commonly made from recycled paper products.
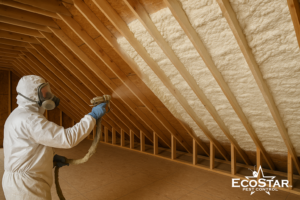
- Spray foam insulation: A specialized option used in certain attic assemblies and applications.
The insulation should be installed evenly, without unnecessary compression or gaps, and should not block required ventilation pathways.
Step 7: Check the Completed Work
After installation, check insulation coverage, depth, air sealing, attic access, and ventilation.
A final inspection helps identify missed areas and confirms that the installation follows the project’s intended specifications.
DIY vs. Professional Attic Insulation Removal
Some homeowners consider removing attic insulation themselves to reduce labor costs. While small projects involving clean, accessible insulation may be manageable, larger or contaminated projects can present safety challenges.
| Factor | DIY removal | Professional service |
|---|---|---|
| Equipment | Requires appropriate tools and protective gear | Uses specialized removal equipment |
| Time | Can take longer | Generally faster |
| Safety | Homeowner manages exposure and access risks | Trained workers follow safety procedures |
| Pest contamination | Difficult to handle safely | Better suited to contaminated attics |
| Cleaning | May miss hidden debris | Can include more thorough cleanup |
| Best suited for | Small, clean, accessible areas | Large, damaged, or contaminated spaces |
Professional assistance is particularly important when the attic contains suspected asbestos, mold, significant rodent contamination, or damaged electrical components.
Homeowners should never disturb suspected asbestos-containing insulation or attempt to handle hazardous contamination without appropriate professional guidance.
Why Attic Insulation and Pest Control Matter for Dallas–Fort Worth Homes
Attic insulation and pest control address two different but connected aspects of home protection.
Insulation helps regulate heat transfer and supports indoor comfort. Pest control helps prevent rodents and other unwanted pests from entering attic spaces and damaging materials.
In Dallas–Fort Worth, homeowners should pay attention to:
- Rodents entering through roofline gaps and openings.
- Insulation damaged by nesting and chewing.
- Moisture problems following roof leaks.
- Uneven insulation coverage and poor attic ventilation.
- Gaps around attic openings that can contribute to unwanted air movement and pest entry.
Replacing contaminated insulation without addressing the source of the pest problem may allow the same issue to return.
That is why attic inspections, pest management, and proper insulation installation should be considered together when underlying problems are present.
How EcoStar Pest Control Can Help Protect Your Attic
EcoStar Pest Control helps homeowners across Dallas–Fort Worth address pest problems and improve home protection through professional pest control and attic insulation services.
Our approach focuses on identifying potential problems, addressing pest activity, and helping homeowners understand their attic protection needs.
Whether you are concerned about rodent activity, damaged insulation, or improving your home’s attic protection, taking action early can help prevent problems from becoming more extensive.
Contact EcoStar Pest Control to discuss your attic insulation needs and request an estimate. Our team can help you understand the next steps toward a cleaner, better-protected home.
Frequently Asked Questions About Attic Insulation Removal and Replacement
How do I know if my attic insulation needs to be replaced?
Look for wet or compressed insulation, mold, musty odors, rodent droppings, nesting materials, and uneven coverage. Rising energy bills and inconsistent indoor temperatures can also indicate insulation problems.
Can I install new attic insulation over old insulation?
Yes. If existing insulation is dry, clean, evenly distributed, and free from mold and animal waste, adding a new layer may be appropriate. Damaged or contaminated insulation should be evaluated and addressed before new material is installed.
How much does attic insulation removal and replacement cost?
A general planning estimate is $2–$6 per square foot for combined removal and replacement. For example, a 1,000-square-foot attic may cost approximately $2,000–$6,000. Actual costs depend on insulation type, labor, attic accessibility, and additional cleaning or repair requirements.
How long does attic insulation replacement take?
A straightforward professional project may take one to two days, depending on attic size, material type, accessibility, and the amount of removal and preparation required. Projects involving contamination or repairs may take longer.
Is rodent-damaged attic insulation safe to keep?
Insulation contaminated with rodent urine, droppings, or nesting materials should not simply be covered with new insulation. The affected material and contamination should be properly addressed, and rodent entry points should be identified.
What is the best insulation for an attic?
Fiberglass batts, blown-in fiberglass, cellulose, and spray foam are common options. The best choice depends on the attic’s structure, climate, ventilation, existing insulation, and project requirements.
Should I remove attic insulation if it has mold?
Mold-affected insulation should be professionally evaluated and addressed before replacement. The moisture source must also be corrected. Larger mold-affected areas or significant contamination may require qualified remediation.
Can I remove attic insulation myself?
DIY removal may be possible for small, clean, accessible areas. However, suspected asbestos, mold, rodent contamination, and other hazardous conditions require professional assessment. Never disturb suspected vermiculite insulation.
How often should attic insulation be replaced?
There is no universal replacement schedule. Insulation should be inspected periodically and replaced when it becomes damaged, wet, contaminated, or ineffective. Properly installed insulation can last many years when kept dry and protected.
Does attic insulation help reduce energy bills?
Proper attic insulation and air sealing can reduce unwanted heat transfer and air leakage, helping your HVAC system maintain indoor temperatures more efficiently. Actual energy savings depend on the home’s existing insulation, air leakage, climate, and HVAC system.
Need help with attic insulation or pest protection? Contact EcoStar Pest Control to discuss your home’s needs and request a free estimate.